Tuesday, 27 August 2013

Ginger Nuts

Been a while I know -  something's up with my computer.  Anyway, I wanted to make some ginger nuts for my mum as it was her birthday but my stupid electronic scales were broken somehow.  So rather than guess the weights, I made myself a set of balancing scales out of some long pieces of wire, my camera tripod and some geometric toys!


So after spending a while trying to make these scales, I needed something to measure my ingredients against - turns out that 1p's and 2p's are made to standard weights: 1p weighs 1/8oz and 2p weighs 1/4oz

So finally I could start making my ginger nuts and here is the recipe - I love ginger nuts but the ones you get from the shop are never very gingery so making your own is good because you can make them exactly how you want.  Also, the recipe is so easy and quick, not to mention the wonderful smell when they're in the oven.

So here we go - how to make ginger nuts:

Ingredients (makes 16):
  • self-raising flour                4oz/110g
  • ground ginger                   1 rounded teaspoon
  • bicarbonate of soda          1 teaspoon
  • granulated sugar              1½ oz/40g
  • margarine/butter               2oz/50g
  • crystallised ginger            small handful - basically however much you like (optional)
  • golden syrup                    2 tablespoons

 Method:
  • First sieve the flour, ground ginger and bicarbonate of soda into a bowl 
  • Then add in the sugar and mix everything together well
  • Soften the butter a little, either at room temperature or on a gentle heat in the oven (it should not be liquid - just soft)
  • Mix the butter with the mix so far and crumble together with your hands until it is a crumbly consistency


  • If you are using the crystallised ginger, chop it finely (although if you prefer, big pieces can be nice) and stir into your mixture 
  • Add in 2 tablespoons of golden syrup and stir everything together into a ball - it should stick together nicely but you may need to use your hands

  • Roll your mix into a ball and divide up into 16 roughly equal pieces and roll each of these into a ball


  • Lightly grease a large (or a few small) baking tray and place the balls onto it, leave plenty of room between each one as they spread quite a lot


  • Squash each ball a little with the back of a spoon
  • Put into the oven on gas mark 5 for 10-12minutes.  I did several small trays so they went on different shelves in the oven - I had to switch them round half way

When they come out of the oven they should be a light golden colour and nicely cracked all over.  They will still be very squishy when you take them out so leave then to cool for five minutes on the baking trays and when they are hard enough to take off, place them on a cooling rack.  Once they are cool place them in a tin or airtight container.  They will probably not completely harden up until the next day.


These are so easy to make and they taste really good - I ended up making four batches in total.  Even my cat loved them and kept hoovering up even the smallest crumb that she found.

If you make these I would love to know how they turn out, let me know in the comments below.

EDIT: so, this post seems to have been popular - I'm going to do another for cheesecake once I sort through the MILLIONS of photos I took whilst making it.  In the mean time, if you have a hankering for recipes and ramblings, check out Louise's blog, you're sure to love it!

Tuesday, 23 July 2013

Look what I found

Yesterday, I found a stag beetle wandering across the road - the adults are around between late May and are pretty much all dead by August so it was nice to see one this year as I haven't already. The one we found was a female - they are quite a bit smaller than the males and don't have the huge mandibles that give them the name.

Male stag beetle (not one that I found)


Instead they have smaller pincers - they can give you a nip but they don't really use them - they're much more likely to just flip over and pretend to be dead!  You would have thought that the males would be more likely to bite, but they pretty much only use their mandibles for fighting each other - just like stags.


This is the one we found, when we first picked her up, pretending to be dead .  I didn't put her like this - in fact, I tried to turn her back over but she just flipped back onto her back!  She stuck out all her legs and just lay there for a while until she presumably decided we weren't going to eat her - at which point she started scuttling around.

They're not the most elegant of beetles, walking or flying, but they can go quite fast if they want to.  When they fly, the males especially, their bodies hang right down underneath their wings and they make a loud buzzing noise.  They are all over the place when they fly, they look completely astonished that they can move about so much - probably comes from spending the vast proportion of their life as a little blind grub (they live for up to six or seven years underground before emerging for just a few months!)


Stag beetles are really amazing and the largest terrestrial beetle in Europe but their numbers are declining because people are inclined to remove the dead wood that the grubs live in.  There is an old stump near us (completely riddled with holes where other beetles have been over the years) we put her on it and she quickly crawled off into it so she must have needed to lay her eggs.

On an unrelated note, I was in Italy recently with my choir and I saw what I am pretty certain was a hummingbird hawk-moth!  If you don't know what that is, it's amazing! (useful I know) It's a moth which beats it's wings really fast and has a long tongue that looks like a beak.  I was so glad to see it and I only wish I had been fast enough to get a photo.  Unfortunately I was too slow so I will have to make do with one from the internet.  Nevertheless, it was brilliant and now means that I have seen five species of hawk-moth.


Now I really would really like to see (or find caterpillars of) the privet hawk moth which is native to England but which I have only ever seen in photographs.


Sunday, 14 July 2013

Slow worms

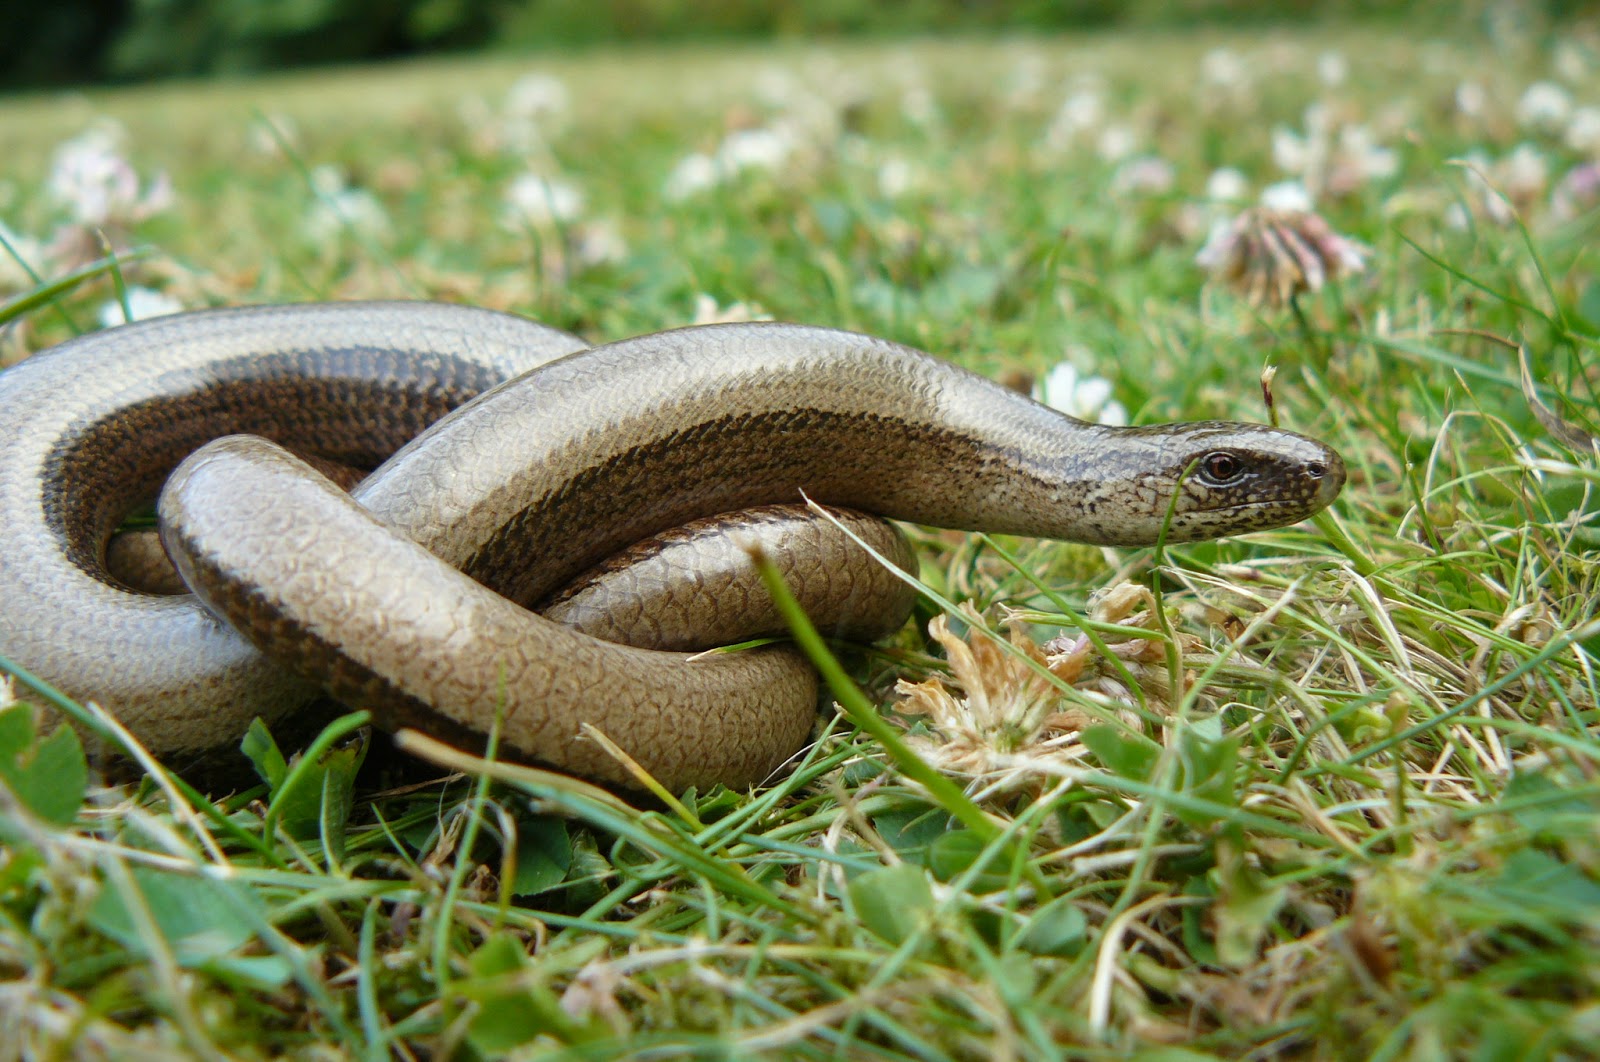
Slow worms are lovely snake-like creatures and this weekend my cousins and I were lucky enough to be able to hold a couple that we had found.  They were found when searching for grass snakes, curled up in a pile of grass cuttings.  I thought they would be a surprise for my cousins (both younger than me) who like me, live in a city - however, when I asked the youngest if she was afraid of snakes (I was about to reveal that they weren't snakes at all) she replied "But you said they're slow worms. They're not snakes - they're limbless reptiles!"  I was surprised and delighted that she knew this because they are indeed - they even have eyelids which most sets them apart from snakes.


look at it's little tongue!!

So this is just a quick little post with my photos of slow worms because I think they are so beautiful and - I want to make this clear; they are not at all slimy, quite dry, just lovely and smooth and wonderful to hold  (like snakes). My cousin couldn't get enough of stroking them! So don't be fooled by the reflection off their shiny scales


One of them managed to tie itself into a little knot - and just when I thought it couldn't get any more tangled he decided to tuck his head under his tail!


We returned them both to exactly where they were found and they quickly shot back into their big nest of grass clippings never to be seen again - for all that they're called slow worms they move quite fast!

Saturday, 13 July 2013

Wheel pendants

I've recently been making these pendants out of wire and beads and so this post is going to be about how to make them.  This as much for myself given that I imagine in a years time I will have to go about making them as if from scratch if I don't record how I have found the best way of making them ;)

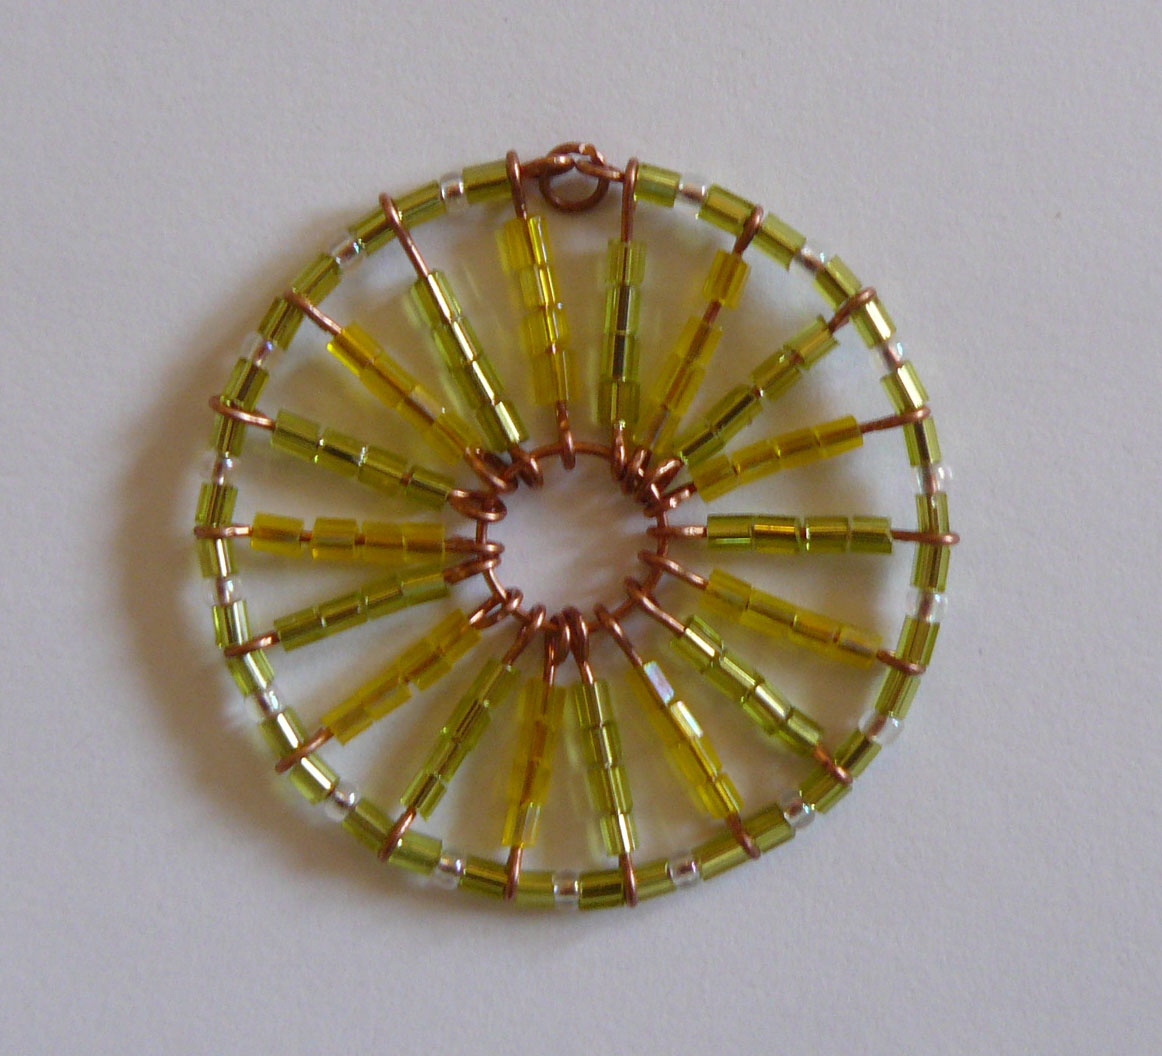
So the finished pendant looks like this, and ends up around 3.5cm in diameter with the amount of beads I use.  I imagine it would be fairly easy to scale the whole thing up or down depending upon preference - I was thinking of making some mini ones for earrings (although, the smaller you make this kind of thing, the harder and fiddlier it gets)


OK, so to make these I use three tools: wire cutters, needle nosed pliers and round nosed pliers (see pic).  Strictly speaking you don't need the round nosed pliers because the needle nosed ones can do essentially the same job, it just means that when it comes to making loops they are nice and round, and also, if you need to make jump rings you don't need to hunt around for things to wrap your wire around (if that doesn't make sense now, hopefully it will by the end of this post!)

Left to right: wire cutters, needle nosed pliers and round nosed pliers

For my wire I used 0.4mm copper wire - though I should stress that using copper is not ideal, especially if you are giving these to other people as it bends easily and tarnishes quite fast.  I only really use it because I love the colour, both when tarnished and untarnished.


I recommend a less flexible wire like a silver plated wire if you don't want to worry about it squashing.  When you're choosing your wire make sure that it's not too thick to go through the beads you choose. Using wire that's too thin will make this pendant too flexible so don't choose teeny little beads. You have been warned ;)

For this pendant, I used red, pink and white beads - the white are transparent seed beads and the red and pink are 2mm long smooth, round bugle beads (if that sentence has taken you into uncharted beading territory you can see the type of beads I mean by clicking here)

Figure 4 - I used these pots to curl the wire around to make the pendant

Step 1: making the spokes for the wheel
  • Cut off a length of your wire and use the round nosed pliers to curl the end into a loop
  • Then straighten it out using the needle nosed pliers to that the loop doesn't bend to the side
  • Thread your beads onto the wire to the length that you want them - remember that the loops on either side add and extra 7.5mm to the length of your spoke.
  • Next cut off your wire, leaving about 1cm length away from the end of the beads and use the round nosed pliers to bend it into another loop and straighten with the needle nosed pliers and the first spoke is finished!

  • For my size of pendant I make 9 spokes of each colour and I generally choose one light colour and one darker of a complementing colour


Step 2: Making the rim of the wheel
  • Cut a length of copper wire around 20cm and make a loop at the end (like the first two parts of step 1) using the round nosed pliers and straightening out with the needle nosed pliers
  • Thread one of the spokes onto the wire
  • Thread three beads: a red, then a white, then another red onto the wire
  • Thread another spoke onto the wire (of the other colour)
  • Carry on threading until you have used all the spokes - do not thread another three beads onto the end after the last spoke
  • Next, cut the wire using the wire cutters, leaving around 1cm after the end of the last spoke
  • Using the round nosed pliers curl this end into a loop and straighten using the needle nosed pliers. Make sure that the loop faces sideways as shown in the photo below
  • Using something round (I used the bead pots shown in the fourth picture) curl this length of beaded wire into a circle - make sure that there is a gap between each of the loops (i.e. don't curl it too tight), there needs to be a jump ring here to secure the ends together.


Step 3: Making the centre of the circle
  • You need to make a large ring for the centre of the circle, if you turn all the spokes inwards you can see roughly how big it needs to be.
  • I make the ring by wrapping the wire around a pencil.  You need to make sure the ends of this ring overlap by a little over 5mm.  To do this, wrap the wire around your pencil a few times and then just carefully trim using the wire cutters
  • Without bending the wire circle out of shape, separate the edges to that it is open.  Don't open it too much - more than around 2mm because you'll need to be able to close it easily
  • Carefully thread this loop through the loops on the end of the spokes - personally, I like them to be quite loose, but if you think it's too rattly, you can thread a small seed bead in between each spoke
  • Once this is done, carefully thread the overlapping end of the ring through the spokes and close it up gently using the needle nosed pliers - this is probably the fiddliest part of the whole thing.

Step 4: Joining together
  • For this, you need two jump rings, one small (normal sized) around 5mm and the other slightly bigger, around 8mm (this is what you will thread your chain or cord through, so however thick the end of your chain or chord, this larger loop needs to be slightly bigger than that)
 
  • To make these, curl the wire around the round nosed pliers - for a larger ring, curl further down the nose (are they called noses? their name suggests that).  Curl round it more than once and then cut straight across the ring using the wire cutters so that the ends line up properly.
  • Use the smaller ring to join the two end loops of the rim of the wheel - separate the ring using the needle nosed pliers, thread the loops through and close again, pressing gently together with the needle nosed pliers.
  • Loop the larger ring through the first by separating and closing up with the needle nosed pliers

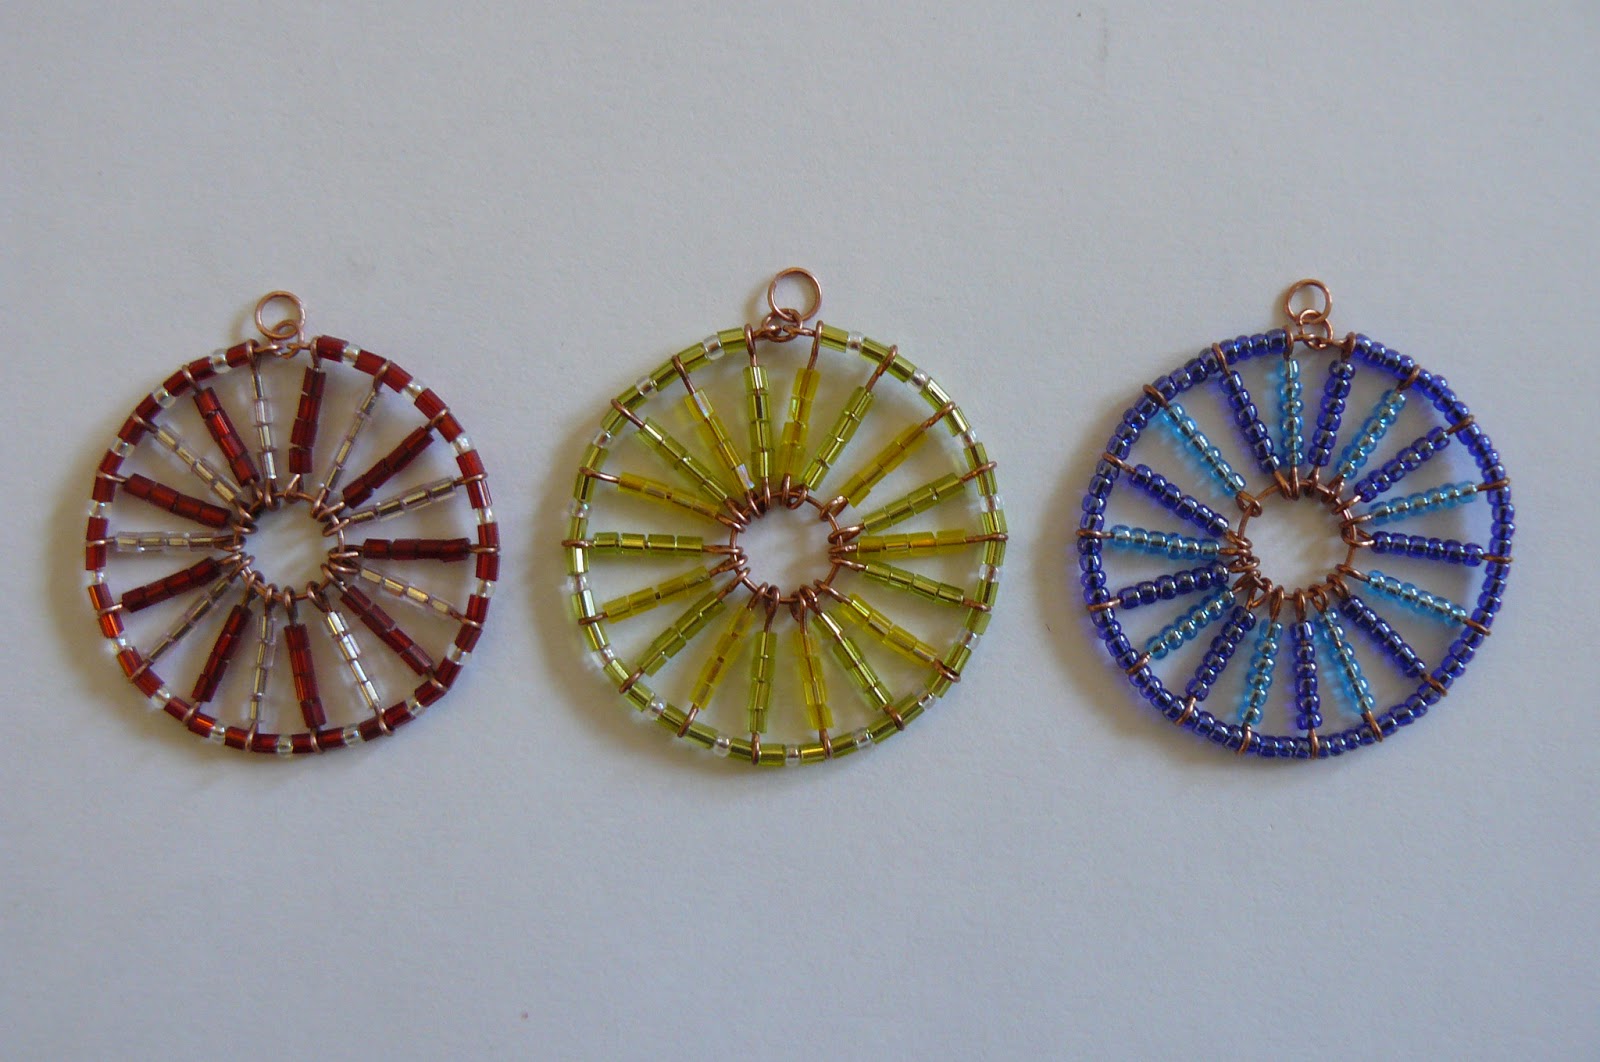
Your pendant is finished - wahay!!! Now all you need is a chain or cord to wear it.  I've made three colours now, a red, yellow and a blue:


The blue is slightly different in that I used only seed beads and none of the longer bugle beads so the number of beads needed for the same sized pendant is slightly different.  On each of the spokes I used 6 beads and between each spoke on the wheel I used 4 beads, but it doesn't make too much difference in the size of the finished pendant.


I hope this is useful to anyone making jewellery out there and if you make one, let me know how it turns out in the comments :)